How to Create a She Shed in One Weekend
So you want to create a She Shed in your backyard? I don’t blame you. The Pinterest-inspired makeovers had me thinking about how to turn my own shed into a little getaway in the backyard. But not for too long though. Because if there’s one thing you should know about me, it’s that I’m going to have an idea to create a She Shed on Wednesday, buy a new mitre saw on Thursday and get to work levelling the old shed in my backyard on Friday morning so I can re-purpose the space and create something special in the backyard for myself. That’s how I roll.
Here’s how I did it in just one weekend. Oh, and I did all by myself.
The Idea to Create a She Shed
I’m not going to lie. The time between having the idea to create a She Shed and actually getting to work on the project was less than 48 hours. I was chatting with my friend on Wednesday about selling the shed in my backyard because it was basically empty. And then I said, “Or, maybe I’ll turn it into a She Shed…” and that one little thought sparked an entire weekend-long project to make over my 10-year old shed.
I spent exactly 15 minutes on Pinterest getting some ideas for my She Shed and decided that the aesthetic was going to be feminine, whimsical and pretty. Those aren’t words you hear me use often, but that was definitely the vibe I was going for. I wanted the She Shed to feel like a little garden escape even though I didn’t have a garden to speak of. What I did have was a mostly empty shed, time, and about $1000 to invest in this little project. So I went all in.
Inspiration and Timing to Create a She Shed
Before I fully committed to create a She Shed in my backyard, I was toying the idea of taking a social media break. It was time. I’d gotten a notification from my phone on Sunday morning saying I’d been doom scrolling the internet for upwards of 5 hours per day. 5 hours? That couldn’t be right? But it was. Despite spending most of my time writing, reading, going for walks, camping, and painting pictures, I still how 5 hours a day to spend on the internet. That’s certainly not why I was engaging in a creative sabbatical and I decided it was time for a break.
So by Thursday afternoon I’d decided to skip social media for the entire weekend and instead of scrolling through Instagram, I went to Home Depot and bought a mitre saw. Because if I was going to jump in create a She Shed in my backyard, I would need a saw. What I thought I was doing was keeping my hands busy so I wouldn’t reach for my phone, but after a few hours, I basically forgot social media existed. It was glorious. And I was the proud new owner of a mitre saw.
The Steps to Create a She Shed in the Backyard
I’m going to start by saying that I am handy as hell, but in no way am I giving you construction advice here. I tend to tackle home renovation projects with the experience and enthusiasm of a child trying to build a sand castle and sometimes my projects look exactly like that: held together by water. But for the most part, I can hammer a nail and bring my vision to life.
I’m just kidding: I’ve done everything from build walls to hang drywall to fix plumbing issues to jack up my car and install under glow lights on the frame. That last one doesn’t have anything to do with home renovations, but you get the idea. Just don’t take any of this advice as solid “how to” when it comes to construction. I think I have to say that for legal reasons.
The Schedule I followed to Create a She Shed in One Weekend
You should understand that I’ve got the kind of ADHD that gets an idea for something on Wednesday and by the following Monday it’s alive and well in the world. I have never had a focus problem when it comes to my own ideas. I will forget to eat if I’m engrossed in something that fully has my attention and my idea to create a She Shed in the backyard had my full attention. Here’s how I did it.
Day 1: Clean and Prep and Start of the Build
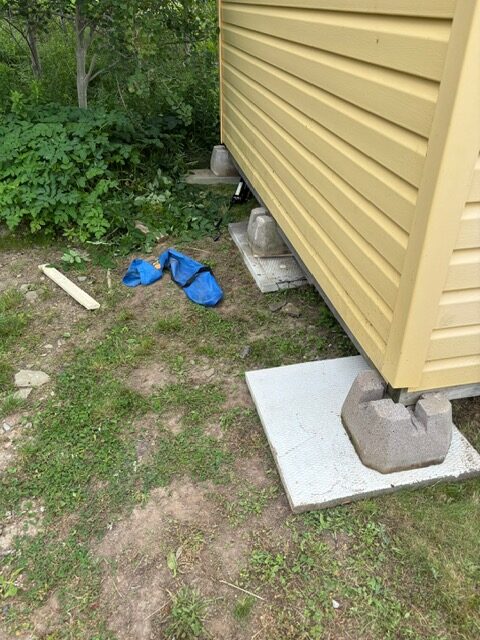
Before I could do anything to create a She Shed from the existing shed I had in the backyard, I had to level it. Here’s where that “not advice” disclaimer from above comes into play. I walked around the shed a couple of times and took some measurements and realized that when the shed was delivered, it was dropped onto blocks in my backyard at a terrible angle. It was way out of alignment. Nobody wants to be out of alignment, especially not a She Shed. So I grabbed one of my car jacks and hiked it under the shed, cranking it until the shed was level with the front of the building.
Then I grabbed some paver blocks I just so happened to have lying around my property from the previous owner, thank you very much, and stuck those suckers under the existing blocks to create a more even height in the back of the shed. It worked on the first try, but if you’ve got something more robust than a car jack, you should probably use that.
Where Does the Motivation to Finish Come From?
I’m all about getting a job done, not worrying about if I’m doing it right or not. Honestly, this was the part I was most excited about. The shed looked ridiculous leaning back on my property like that and it took less than an hour for me to get organized and get it sorted out.
As I mentioned, my shed was mostly empty. But it wasn’t always like that. Recently, I’ve started selling things I no longer use to make room for things I actually want and also, if I’m being honest, to clear house for when I eventually hit the road traveling on a full-time basis. As I’ve gotten more clear on my dream to be a full-time traveling woman, I’ve basically stopped buying things. But I’d never turn down the chance to buy a new power tool, especially if it was attached to such a cool project like this. My shed once housed a bunch of patio furniture, a kayak, and some camping supplies.
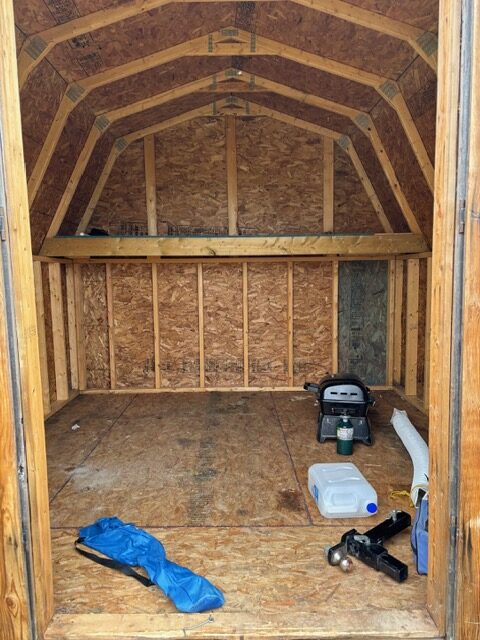
I don’t own a lawn mower because I pay two men to maintain my lawn. Once I’d cleared out the shed earlier this summer, I thought I would just sell it. What else was I going to do with it? Oh right, create a She Shed! Why didn’t I think of that? Because of the previous clean-out, it was pretty easy to get the remaining items out of the shed. I threw away what was garbage and I put the remaining items to the side.
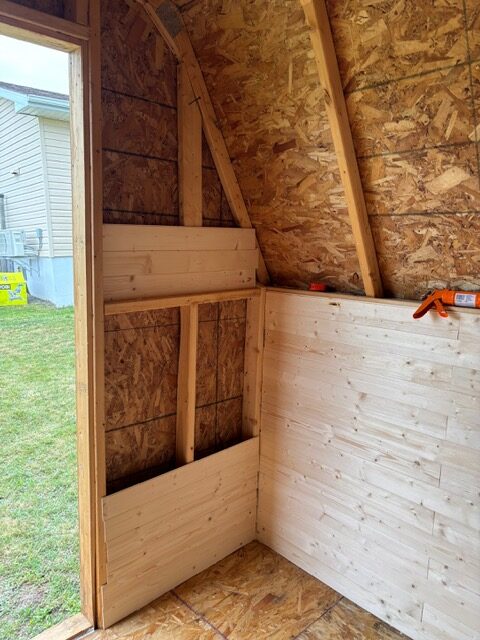
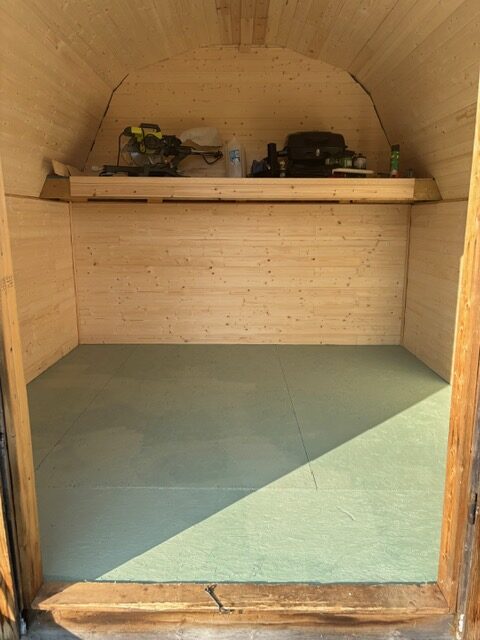
I decided on the fly (that’s how I make a lot of decisions, to be honest), that I would build a storage box in the shed to house the items I couldn’t store in my basement. Namely, propane tanks. A camping bbq and some tools for my camper. Maybe. We’re making decisions on the fly here, remember?
Clean, Clean, Clean with the Trolley
Next, came time to sweep and vacuum out the shed. There was a serious amount of dirt and grass and bugs all over the floor. I realized I was probably going to have to seal the edges of the shed in some way to stop the bugs from getting in there once it was all pretty and She Shedy, so I bought myself a caulking gun and some silicone to further prep the area.
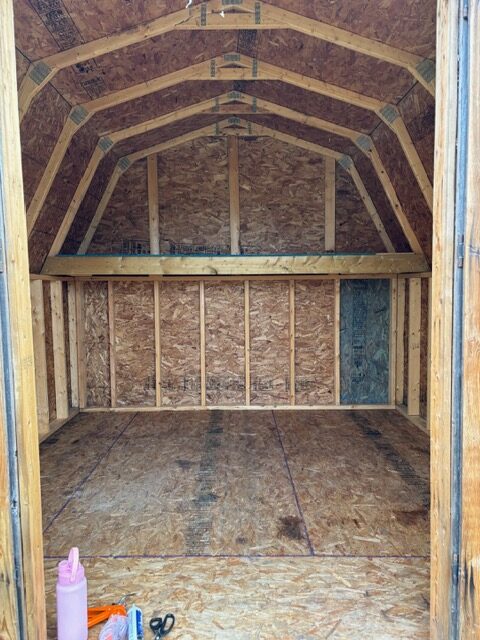
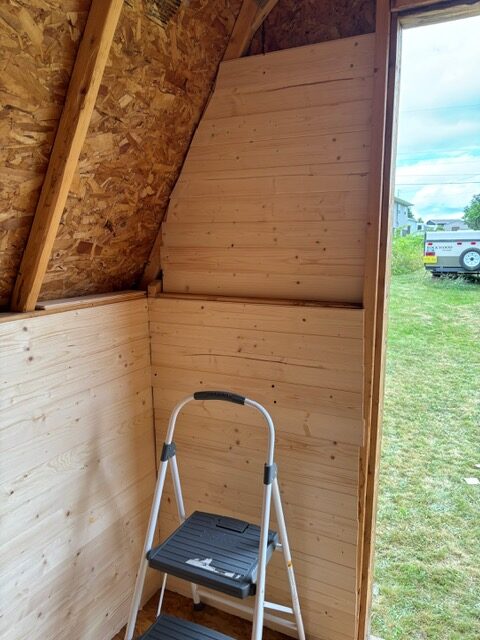
After the floor was swept twice and all the large debris was removed, I got my cordless vacuum and gave every corner and seam a once over to make sure there were no dead bugs or extra dirt in places that would just grow gunk on it over time. It looked pretty good, to be honest. I was happy with how clean the shed came and I could really see how much space was in there, including, much to my excitement, a small loft area that I was absolutely going to turn into a reading nook with a ladder. Maybe. Everything is an option. But first, I had to seal the seams.
It turns out that trying to pump caulk using a caulking gun when you have arthritis in your hands isn’t ideal, but it got the job done. It only took using both hands for almost an hour to run along the base of the shed inside and the sidewalls. These were the areas I could see the most debris before I cleaned and aside from the hornets that kept trying to build a nest in there, it was mostly ground critters trying to make a home.
Closing the Deal
What about those hornets? I’d already treated the shed with some pesticide to stop them from going in and it is mostly working. I decided that I’d invest in some weather stripping to go around the door since I plan to reuse it and not replace it to really help keep the bugs out.
Once the edges of the shed and floor were sealed with silicone, I went to work putting together my brand new mitre saw. I knew I had to let the silicone dry anyway and it was still early in the day. Turns out, putting the mitre saw together would be the thing that took the most time and bested me for half an hour when I couldn’t unlock the blade. It took watching 3 YouTube videos and reading and re-reading the instruction manual to figure out that I had to pull the locking pin, marked, “locking pin” to release the blade. Duh!
It’s a good thing I was working on this project alone because I was embarrassed to death. Not so embarrassed that I won’t share it with you here now because it all comes down to experience. I already knew how to use a mitre saw (see building walls from earlier), but I’d never used a new-out-of-the-box mitre saw and thankfully it was mostly together. I just had to add some levelling bars and release the blade. Should have been easy. I was sweating like nobody’s business.
Choosing the Right Materials
Because I’d spent almost no time at all searching on Pinterest to find some inspiration to create a She Shed, I was still thinking about what kind of materials and finishes I was going to install in the shed to make it look and feel pretty when I was on my way back to Home Depot to buy them. I walked around the lumber section for a good 10 minutes (you’ll see we’re not wasting much time doing research here because the only way to finish something like this in a weekend when you’re working on it by yourself is to make decisions quickly), and decided that I wanted to install shiplap on the walls.
Whether or not I would paint them will be a decision for later, but to start, I wanted to cover the 2×4 walls in the shed with knotty pine shiplap.
Starting Somewhere
I had measured the walls of the interior of the shed before I hit the road to buy supplies and had the numbers recorded in my notes app on my phone. I pulled out my phone and did some quick math in Home Depot and realized I’d need about 10 packages of shiplap to start so I bought those, loaded them up into my SUV and drove home to start installing them. As soon as I got the shiplap unloaded from the car and plugged in my mitre saw, it started to rain.
That’s how I discovered that the extension cord I had been using wasn’t long enough to allow me to put the mitre saw in the shed, which would have been the obvious answer, so I had to decide if I was going to wait until the rain stopped or…or! I could just cover the saw with rain jacket when I wasn’t using it and that would (mostly) keep the rain off my brand new piece of equipment. It worked pretty well, honestly. I just hope none of my neighbours saw me messing around with electrical equipment in the rain. It’s fine, I’m sure.
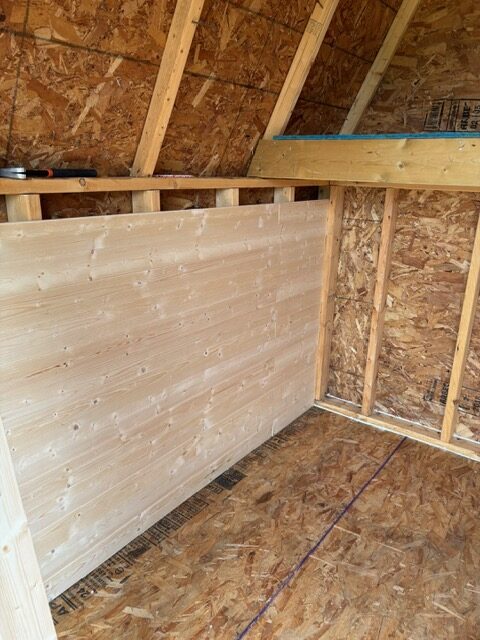
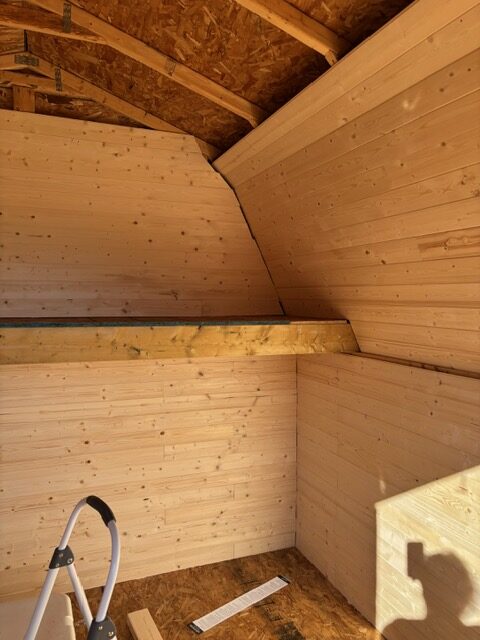
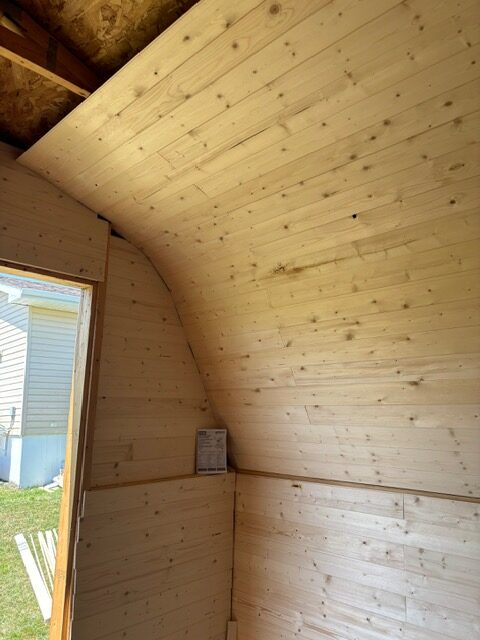
Placing the First Pieces of ShipLap to Create a She Shed
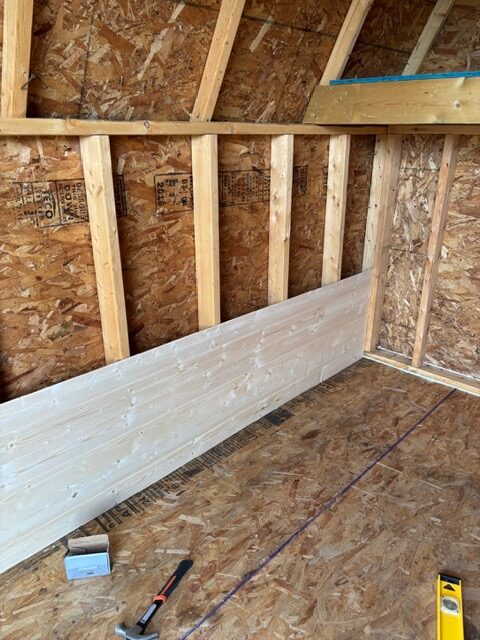
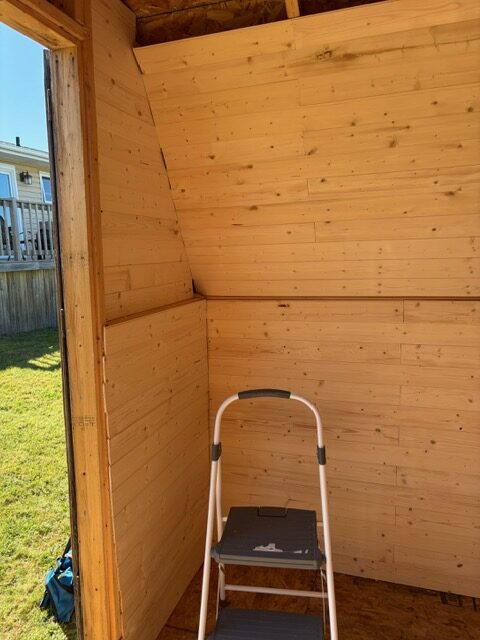
I’ve always been a fan of any kind of wooden walls, accent walls, wainscotting and shiplap. It was an obvious choice for me because it’s actually really simple to install. (She’s says writing this before she took on the gabled roof!) It took another hour of figuring out a pattern with the shiplap to really get a grove going to enclose the first wall in the shed. My shed walls are 9 feet 5 inches long and 4 feet high and wouldn’t you know it, the shiplap fit perfectly without needing to be ripped or cut along the top.
Thank goodness because you know what your girl doesn’t own? I rip saw. The construction Gods were with me on this one. In total, it took 2 hours to install the first side of the shiplap and with the rain and humidity, I was starting to get a headache.
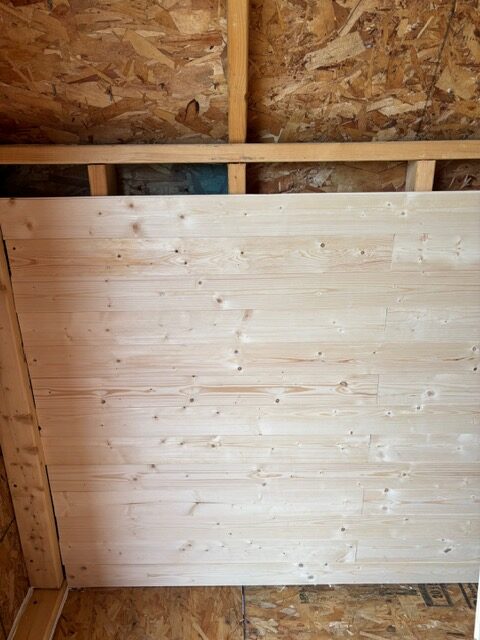
By then it was almost 4 pm and I’d put in a solid 8 hours of work on the She Shed to wrap up day 1, but I wasn’t finished yet. I decided to at least get a start on the second wall before closing it up for the night. I finished that side with 4 rows of shiplap when the sky opened up and there was really no safe way of using the mitre saw in rain like that so I called it a day.
Day 1 Costs and Total Time
The total costs to prepare and complete the first phase of the She Shed is as follows.
Mitre Saw: $259. + tax
Caulking Gun: $6.67 + tax
Silicone: $11.49 + tax
10 Packages of Knotty Pine Shiplap: $421. 80 + tax
Box of 3/4 inch finishing nails: $9.57 + tax
Total Spent: $708.79 + tax
The total time spent in labour:
Levelling the shed: 1 hour
Cleaning the shed: 30 minutes
Sweeping and Vacuuming: 30 minutes
Applying Silicone: 1 hour
Driving to Home Depot to Get Supplies: 60 minutes with travel included
Installing shiplap: 3.5 hours
Lunch: 30 minutes
Total Project Time for Day 1: 8 hours + 2 hour nap immediately afterwards (for obvious reasons)
Day 2: Continue Shiplap Installation
When I got the idea to create a She Shed in the backyard, I gave myself a timeline to work with. I find I have a better chance of succeeding with my projects if I set some expectations. Sometimes those expectations are realistic. And sometimes I do things like say I’m going to renovate and create a She Shed in my backyard in one weekend. But so far so good. Day 2 of the reno project saw me finishing the second wall of the shed after finishing the first long wall on day 1.
Because I’d spent so much time on day 1 cleaning, prepping and figuring out the pattern for the ship lap, there wasn’t a lot of time to actually move the needle on the project. Day 2 meant digging into the meat and potatoes of the project, which, by all accounts was the installation of the shiplap. And here’s why I didn’t make more progress on day 1: I wasn’t entirely sure how far I was going to get with the shiplap installation.
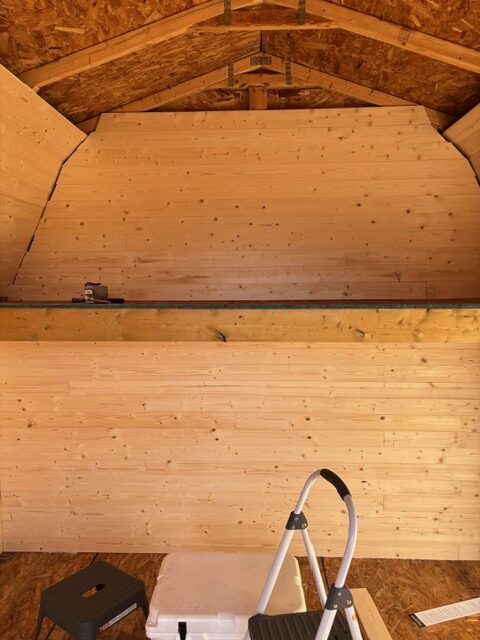
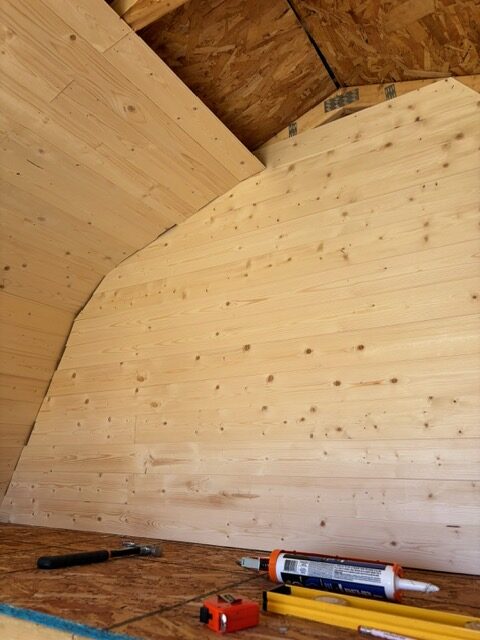
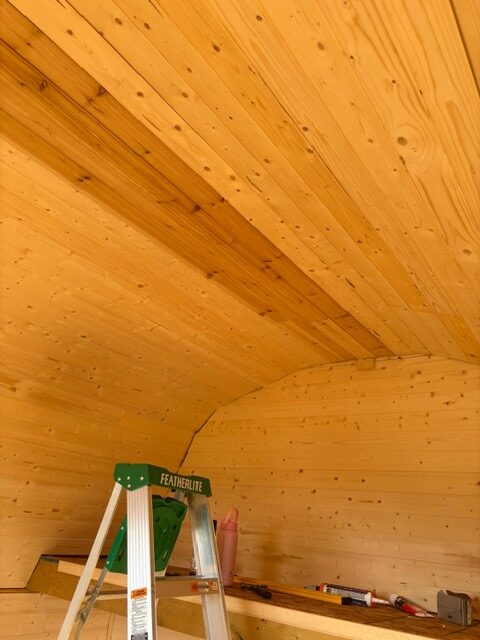
When I stood back and looked at the gabled roof of the shed, I figured it was going to be pretty difficult to align the interlocking pieces of wood on an angle. But after looking at it closer on day 2 and test driving a few pieces of scraps left over from day 1, I decided to just go for it.

Making Decisions on the Fly
Decision-making on a project like this might seem overwhelming but I stick to a tried and true system for myself to make sure I don’t get stuck in analysis paralysis and actually finish a project once in a while. Instead of spending any amount of time researching or weighing my options, I just ask myself what my expectations of the finished project really are.
For example, if I started installing the gable and it turned out to be difficult or I couldn’t get the pieces of shiplap to interlock at those angles, I could always abandon the effort and return the unused pieces. Knowing that I haven’t carved anything in stone with this project, or any project if we’re really being honest with ourselves, makes it easier to just dive in and see what happens.
What Else is There?
The other thing I consider when I suspect there might be some issues with completing a project the way I want is to consider the alternatives. When I considered my options for making the inside of the She Shed aesthetically pleasing, I was really only looking to please myself. I thought maybe I would install shiplap on the vertical walls and then add swagged fabric or drapes across the ceiling to make it look whimsical while hiding all the random nails and 2×4 beams in the ceiling.
It would be good enough, but once I tested the scrap pieces of wood and saw how easy it was, I decided to invest more money in shiplap and carry on covering the entire interior with the wood pieces.
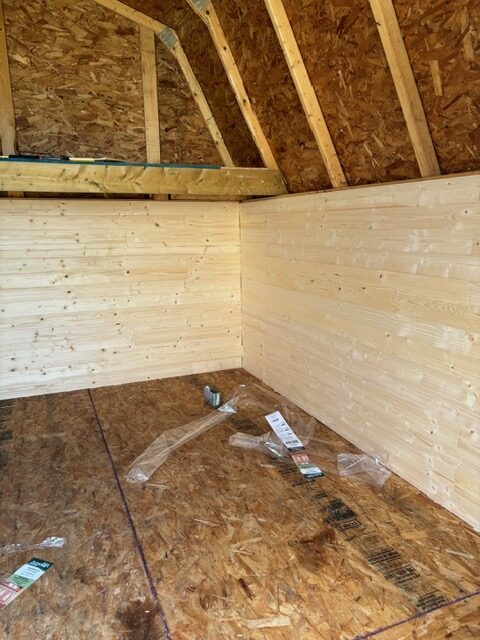
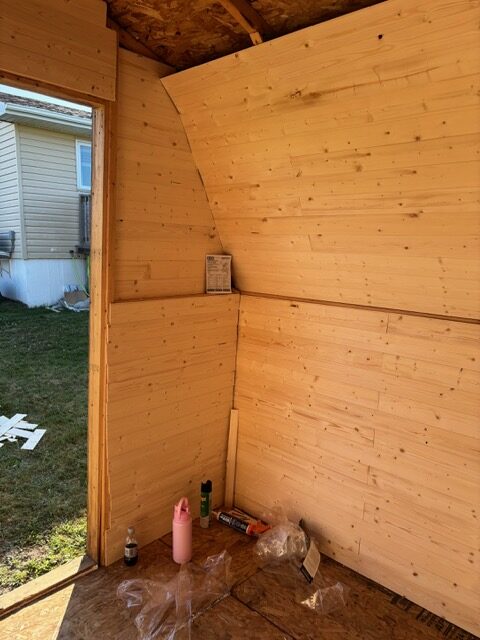
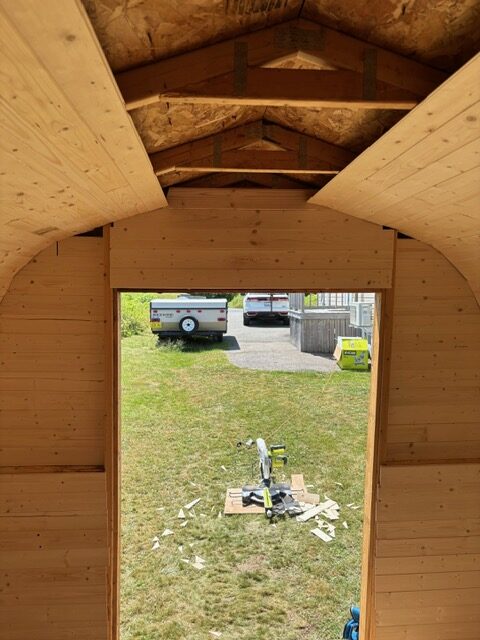
It turned out that installing the shiplap on the gabled roof of the shed was by far the easiest part of the entire build. I spent several hours finishing the second wall, the back wall and around the door and then decided to tackle the loft area, which I was going to just cover with a curtain, but then decided to keep going again.
While I worked on the project to create a She Shed in the backyard from 9 am to 6 pm on the second day, I did have to run back to Home Depot to buy more wood and then made a detour to McDonald’s for some ready-made lunch because if there’s one thing I know about doing literal manual labour: the last thing I want to do at the end of the day is cook. But it turns out that I needed a quick and easy meal for lunch instead. Dinner came later. And I cooked it. Because who else is going to cook it?
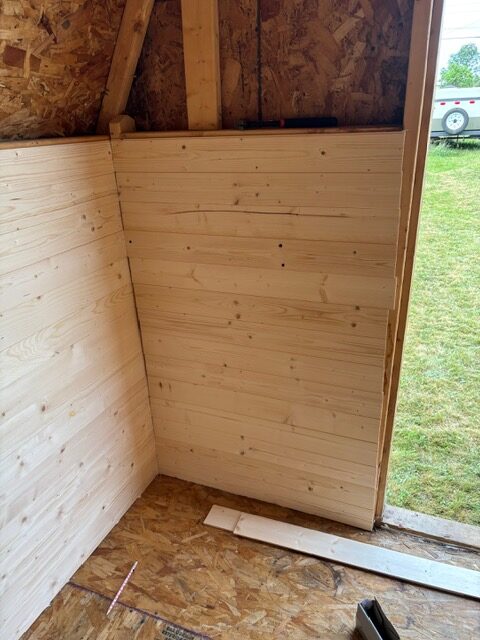
Cutting Angles for the Gable
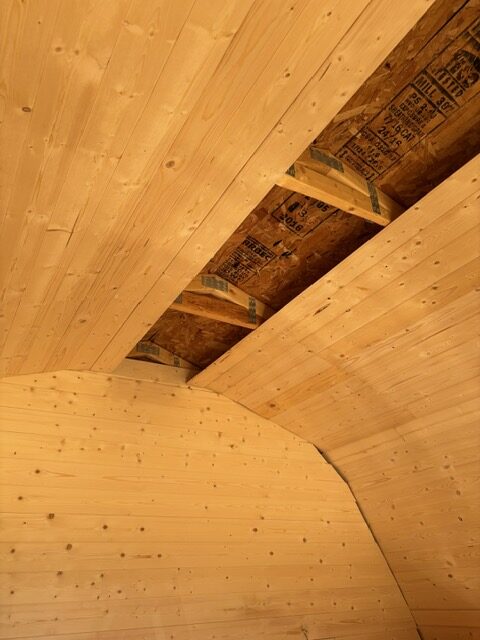
I was pleasantly surprised how easily the shiplap installed on the pitched roof beams in the shed, but it did end up taking quite a long time because of the spacing of the beams. They weren’t the same of the framing boards on the main walls of the shed and so I had to figure out a pattern for cutting and securing the shiplap panels in a way that made sense, kept the waste product to a minimum because this wood is $42 for 6 pieces which covers only 13 sq ft, and because there’s nothing I hate more than leftover wood pieces hanging around the yard or house for use “someday.”
But in order to properly follow the lines of the gabled roof, I had to make a template that followed the angle. I grabbed a small piece of scrap that was near the saw and reversed the angle so that when it was flush against a new piece of wood, it made sense to cut along the proper line. I didn’t take a picture of the template. Sorry.

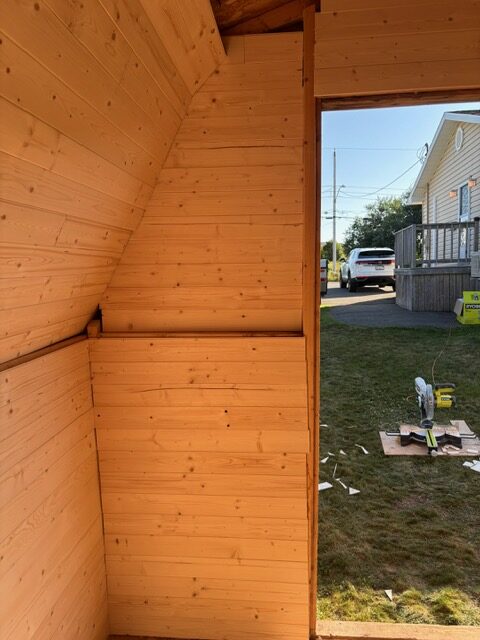
Finally, I had to give up on the day’s work when I realized I was going to need a proper ladder to continue installing the shiplap on the ceiling of the shed. And I needed to buy more wood. Again. I figure about 2-3 bundles should do the trick, but I’d be sure to measure before I headed out one last time to get the extra shiplap pieces, as well as some trim to cover the areas where gaps were left by the wood in the corners. Hey, I never said the job was perfect. I said I set expectations and not all of the attempts to hang the shiplap met my expectations. Such is life.
Day 2 Costs and Total Time
The total costs to prepare and complete the second phase of the She Shed is as follows.
10 Packages of Knotty Pine Shiplap: $421. 80 + tax
Total Project Spend to date: $1130.59 + tax
The total time spent in labour:
Installing second wall, side walls around door: 2 hours
Driving to Home Depot to Get Supplies: 60 minutes with travel included
Lunch: 30 minutes
Installing shiplap: 4.5 hours
Total Project Time for Day 2: 8 hours with no nap!
Day 3: Finish Shiplap Installation, Trim, and Paint!
I woke up on day 3 feeling like I’d been hit by a bus. Fun fact: I’ve been hit by a bus so believe me when I tell you that’s how I felt. But no matter. There was work to be done! I ran out of shiplap on day 2 just before wrapping up for the day so I knew I had to start day 3 with another trip to Home Depot.
My worry was that I had all but cleaned out their supply of knotty pine panel boards and I was pretty sure they didn’t restock on Saturday night, but I had to try. Dawning the same outfit I’d been wearing for three days now (because why ruin more than one pair of shorts and a tank top on a weekend project right?), I made my way to Home Depot.
What Else Do I Need?
I picked out some pine trim that I’d need to finish the corners of the shed because while I’m handy, I’m not always patient with measuring things in the heat so some of my boards are longer than others where the corners come together. It’s fine. That’s what trim is for! I also picked up some weather stripping that I could install around the door frame to help keep the bugs out and I got some No More Nails adhesive because I figured it would be hard to nail the trim into dead air behind some of the pieces of shiplap so that would give me some more leverage where I couldn’t use nails.
I also bought a new ladder because my step ladder wasn’t cutting it anymore. Access was needed! As I was making my way to the shiplap bin, I came across this pretty little piece of decorative moulding that had ivy leaves carved into it and I immediately knew it would be the perfect trip to top the loft space since that was a giant 2 x 6 piece of wood just stuck in the middle of the shed space. It was perfect.
And finally, Home Depot didn’t restock their knotty pine panel boards but they did put a few strangling pieces out wrapped in cellophane. Since I was just trying to finish the ceiling of the shed, I figured a few beat up boards would do the trick. And they were on sale. Score.
Installing Ceiling Boards is a Bitch by Yourself
I’d gotten through two full days of renovation and installation by myself and never once wished someone was there to help me. I get a lot of satisfaction out of having a vision, doing the work to bring that vision to life, and not having to compromise on how I do things. However, once I started having to install the ceiling boards, I wished more than anything that I’d had another person there to help me because man, it was really, really hard to install boards while holding them up in place. Not to mention, the temperature got up to 29 degrees with a “feels like” 35. I was dying. I couldn’t drink water fast enough.
What’s more, it turned out that the ceiling beams weren’t the same distance apart as the wall beams, so I had to measure every piece, even though I’d developed a really easy flow the day before. It meant sometimes I’d start hammering in a board, only to realize it was still too long and I’d have to get down off the ladder, grab the board, cut the board, get back up on the ladder and start all over again.
It was right about the third trip off the ladder to cut a single board that I wished I had just painted the damn ceiling. But I was in it at this point and there was no going back. So I continued to sweat like my ass was on fire for several hours to finish the ceiling. Except! Except, I ran out of boards again and had to make another trip back to Home Depot to get a different kind of board.
What Now? They’ve Run Out of Boards!
I stood near the bin in Home Depot looking at the cedar pieces of shiplap that were, as it turned out, several dollars more a square foot than the original boards I bought. But what choice did I have? I only needed 4-6 boards and one package of panels came with 6 boards. So I decided to spend the $60 and get the boards. That’s $10 a board if you’re doing the math. Ouch!
I stopped for an iced capp and Tim Bits on the way back to my house because I’d once again forgotten to eat in the heat. I was mostly concerned with not dying of heat exhaustion trying to install these boards and drank so much water I thought I’d might float away. An iced capp sounded like the right answer. It wasn’t. I’m lactose intolerant, but I figured I deserved a little, painful, treat after all this hard work!
Returning home, I found myself growing more sluggish in the heat, and each board installation was taking so much longer than before. It took me a couple of hours to install those last few boards, and the last piece of board needed to be secured in a different way because there was no beam to install it into. I got a little crafty and built a small “shelf” to rest the board on. You’d never know it was there.
And once I decorate the space, you definitely won’t know it’s there. Plus, from down below, it looks great. The choice of cedar boards, which wasn’t really a choice because Home Depot didn’t have any other kind of board, made the entire space smell like standing in the woods. I love it! And I ended up with one left over so I installed it across the loft beam to make it look nicer. It did. A lot. I was happy with my choices.
Let’s Get Ready to Paint!
Once the wood installation was complete, I cleaned the shed one last time to prep for paint. I’d decided to paint the floor instead of installing a floor, because let’s be honest, it’s a shed. I’d already invested enough money into this project. While I could have gone out and bought paint, I figured there was probably enough of something in the basement that I could use. I did contemplate painting a mural or design on the floor, but there wasn’t as much paint as I thought so I mixed the two cans I had together: one deep forest green and one white, one-coat primer.
The deep forest green was a beautiful color I’d painted in my son’s room, but it was too dark for the space and there wasn’t enough to do the entire floor, so I added the entire can of white primer to it, effectively doubling the amount of paint I had and changing the color from a deep green to a soft fern color. It took less than 20 minutes to paint the floor and since I had a little bit of paint left over, I decided to paint the inside of the doors.
Just as I was about to finish painting the inside of the doors, the broom handle I’d screwed into the paint roller broke and as I’m writing this, I’m just remembering that I actually own a telescoping painting stick that I completely forgot about. So now I’m out one broom. But I finished the doors by hand. And just like that, my three days of work came to an end.
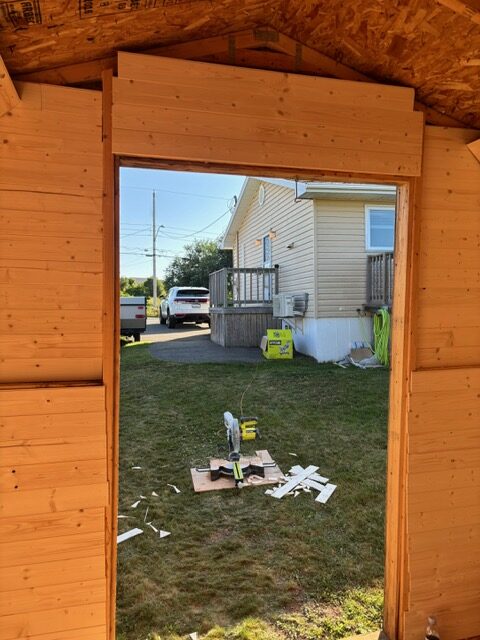
I stood back with a tired smile on my face and called it a job well done. Here’s a reminder of where I started and where I ended up!


Day 3 Costs and Total Time
The total costs to prepare and complete the final phase of the She Shed is as follows.
2 packages of Knotty Pine Shiplap: $84.36 + tax
6 pieces of Pine Quarter Round: $119.88 + tax(returned 4 on the second trip to Home Depot because I didn’t need them for a refund of $79.92)
2 packages of Weatherstripping: $17.96 + tax
No More Nails: $11.73 + tax
Decorate Moulding: $18.72 + tax
Ladder: $97 + tax
1 package of Cedar Shiplap: $61.54 + tax
Total Project Spend to date: $1461.86 + tax
The total time spent in labour:
Installing ceiling and trim: 5 hours
Cleaning: 30 minutes
2 Trips Driving to Home Depot to Get Supplies: 60 minutes each with travel included
Lunch: 30 minutes
Painting Floor and Doors: 40 minutes
Total Project Time for Day 3: 9 hours
Day 4: Thrifting and Sourcing All the Goodies to Create a She Shed
After three days of back-breaking labour (I don’t say that lightly), I finally got to do the thing I love best about a renovation project: decorate! But because I’d basically blown the budget on wood panels to the tune of about $1400, I decided to challenge myself to furnish and decorate my little shed shed for $590. Weird amount, I know. But that’s exactly how much money I had in an envelope from selling things I no longer used on Facebook Marketplace over the last couple of months. And since that was cash in hand, it’s like I’m getting the finishing touches for free. Not really, but if you know, you know.
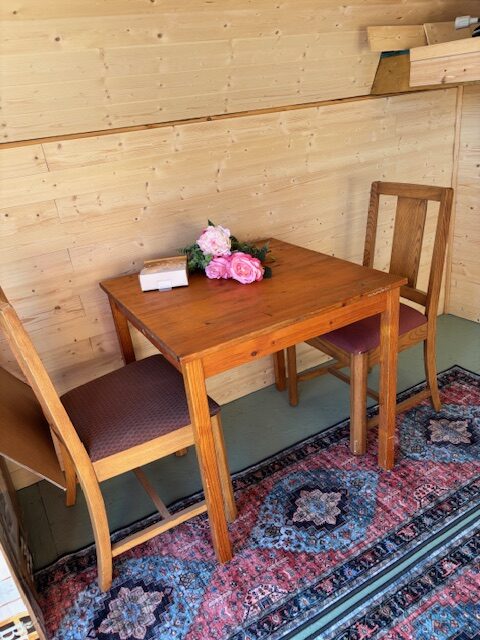
I emptied my SUV and lowered the seats, heading out to find the perfect pieces of thrifted furniture to complete my she shed. I’d decided that I wanted a desk for writing and doing art projects, and I wanted some kind of cabinet or side table. I hoped to find a big comfy chair because as tempting as it was to put a bed in there, it’s a shed.
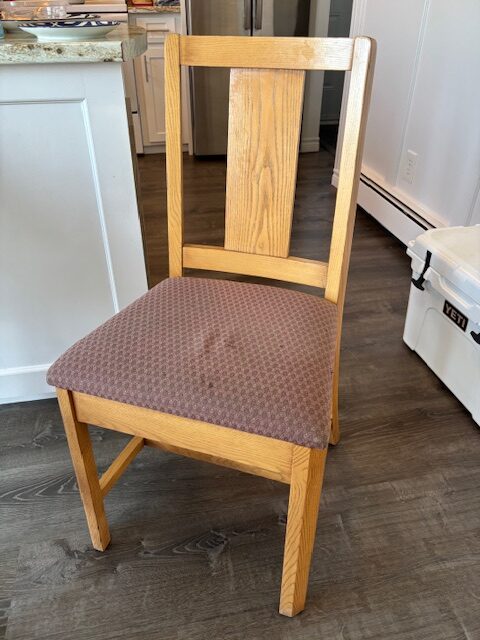
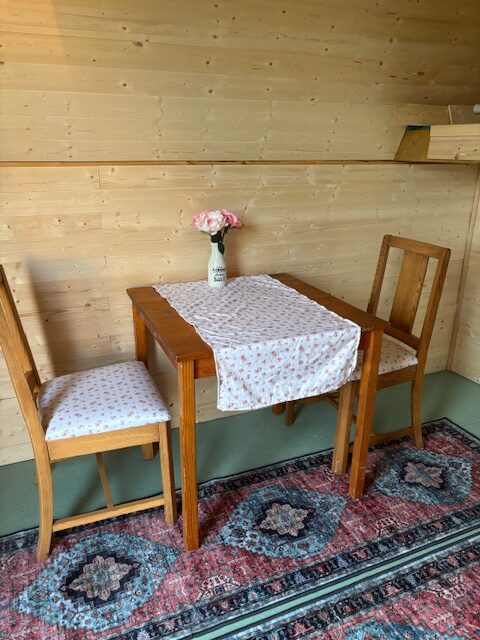
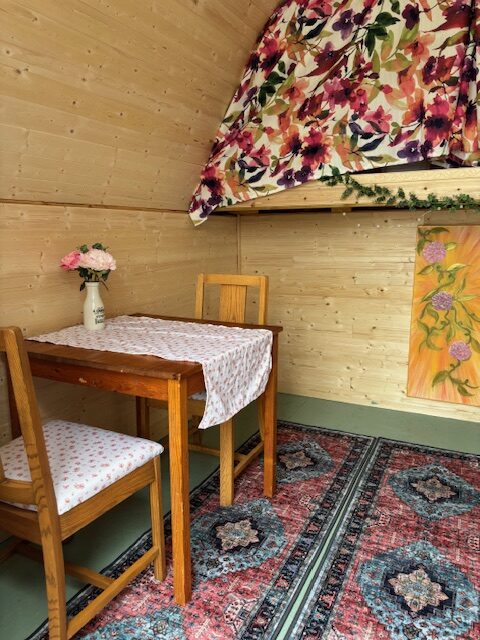
There will be some kind of bug sneaking past my very (not very) secure weather stripping work and I just don’t want to pretend they aren’t there. I searched Marketplace for a while in the morning and then decided it wasn’t worth trying to go back and forth with people to see furniture and buy it on their schedule so I hit up the closest used furniture store (that was open. Small town problems, amiright?) and found the perfect little table set with two chairs that needed some love.
Always Keep Your Eyes Peeled for Hidden Gems
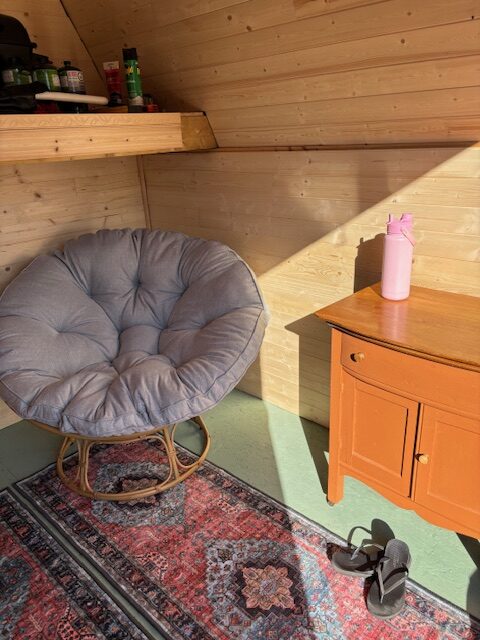
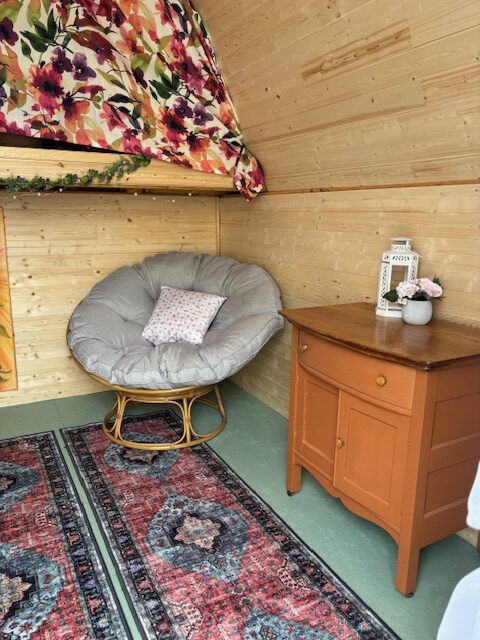
I was heading out the door feeling like I’d scored big time when I came across a little cabinet, in the perfect coral pink color I’d been thinking about and scooped that up too. The salesman was skeptical it would fit in my car. I drive an VW Atlas Cross Sport and you could put another car in the back of that thing. The four pieces of furniture went in with no problem and there was plenty for room to spare so instead of going home, I hit the thrift store about 20 minutes away.
Wanting curtains but not wanting to pay full price for new curtains (it’s a shed, remember), I hit the thrift store to find something I could either make curtains out of or find ones I liked. I came across two sets of bold patterned curtains with pink and fuchsia and green and yellow and I was tempted to hang them in my living room, I loved them so much. But into the shed pile they went.
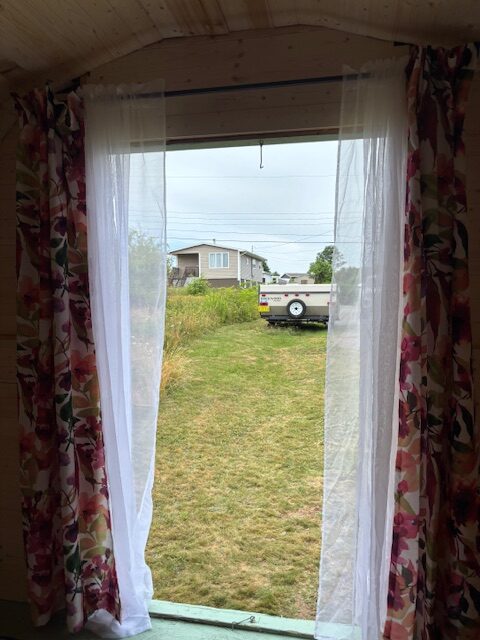
I found a set of sheers to give the doorway some whimsy, and I found an adorable flat sheet from the bedding section that I knew immediately I would use to cover the old fabric on the chairs I’d just purchased at the used furniture store. This makeover was shaping up in no time flat!
After I found my thrift store items, I ran next door to Giant Tiger and got a curtain rod. They are hard to find used with all the fixings. And my final stop was Home Sense where I was looking for a 5 x 8′ rug for the floor of the shed in a pink or orange pattern but they didn’t have anything large enough that I liked so I bought 3 runners in the same pattern to make one larger rug.
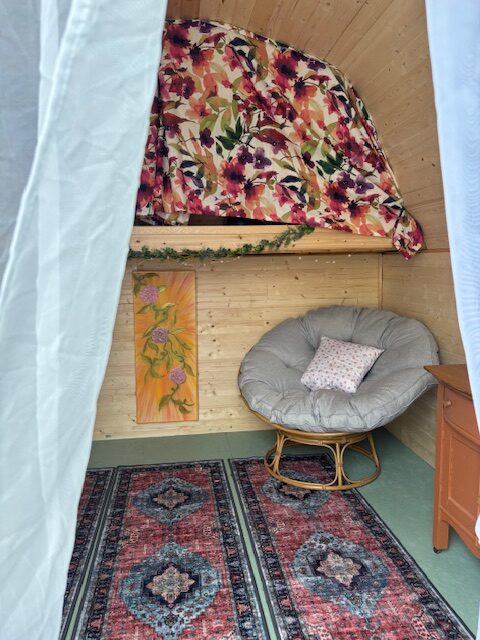
The Perfect Chair Doesn’t Exist…
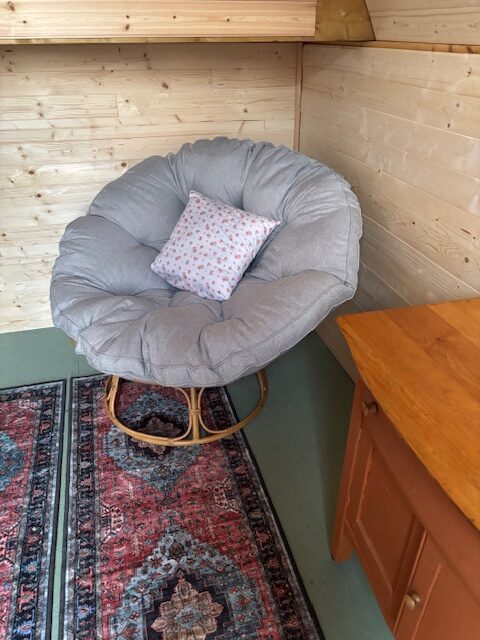
Oh, I forgot I also hit up Walmart for a staple gun, some fairy lights, and some greenery to finish the accent pieces off. Because I hadn’t found any big comfy chair I wanted, I decided to order something online. It would take a few days, but it would be…wait a minute! It’s the dead of summer here right now but you know what Walmart thinks it is? Walmart thinks this season is called back-to-school.
And you know what back-to-school season brings with it? Student furniture. And you know what is the perfect piece of comfortable student furniture? A papasan chair. Sold. I had to make a second trip back to Walmart to pick it up but I had just enough left in my budget to buy the chair, even after getting the brand new rugs at Home Sense. I was in love.
That meant that in less than one afternoon, I found everything I wanted to stock my little she shed and make it perfectly pretty inside. I just had to lug it all home and unload it into the shed first.
Making Things into Other Things to Create a She Shed
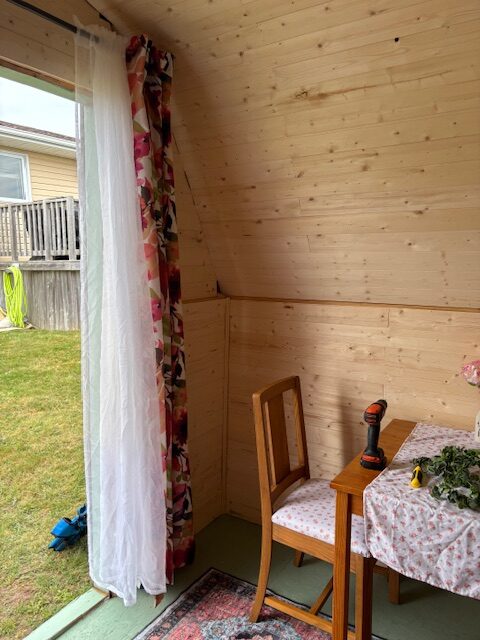
I picked up this pretty floral flat sheet at the thrift store and because it was a queen size sheet, there was plenty of fabric to make seat covers, a table cloth and a truck load of throw pillows out of it. I had that new staple gun handy so it was easy to cut and stretch fabric over the dusty old seat covers and make the chairs new again. Sewing a table runner instead of a table cloth to preserve the wood-look in the shed worked well and then I sewed a sweet little throw pillow for my favourite new chair.
I’d also scored those beautiful floral curtains so I decided to use one set to frame the doorway, just to add a pop of color and whimsy. And I used the other set to hide the storage loft in the back of the shed. I hung the curtains on the new rod I bought and it turned out that the sheers I bought weren’t a matching set, but for $6 for the set, I wasn’t going to complain.
I put that new staple gun to use one more time to hang the other set of curtains along the loft space and it created a gorgeous accent wall that’s really hiding all my new tools and propane tank for my camper. It’s adorable.
Finally, I scavenged my house for a few odds and ends to finish the space off and I’m sure over time, I’ll drag more things out there to make it comfortable and pretty. But the last thing I did before I call it a done-like-dinner project was grabbed a piece of my artwork and hung it on the back wall so it’s the first thing you see when you walk into the space. It’s fucking perfect.

Why Bother Making a She Shed?
I shared a little bit of the work I’d done on Instagram and Facebook before I finished the decorating phase and I got a mixed bag of comments from people. I didn’t expect people to cheer me on, but I certainly didn’t expect people to lean into “why bother?” or “isn’t your house big enough for you?”
I was surprised, to be honest that such a fun project which brings me oodles of joy to have thought up and completed all on my own would have people condescending the efforts. I know those comments aren’t about me, but Jesus, some people are miserable. It made me love my little she shed even more. No, I didn’t need more space to sprawl out and enjoy myself. But I wanted it. End of story.
That’s the great thing about my life and what I always hope to inspire in others (except those Negative Nelly’s who can spin in their own misery for all I care): do the things you want to do. You get this one life.
You want a She Shed? Build it. You want to take the trip? Book it. You want to write a book? Write it. You want to sell everything you own and move into a van? Make it happen. But for the love of God, if you’ve gotten this far in the epic adventure that is this blog post, do not spend one second worrying what other people think about something that makes you giddy with delight. “Because I felt like,” is a complete answer.
If you’re feeling inspired and want to explore your creativity, consider joining my 5-day Creative Challenge. I started this journey making art and writing more, but the rules were simple: follow the yeses. And a yes last week turned into a completed She Shed this week. What are you waiting for?
Decorating Day Costs:
Table and Chairs: $100
Cabinet: $50
3 Runners: $29.99 + tax each
Curtain Rod: $15 + tax
Curtains, Sheers and Bed Sheet: $40
Staple Gun and Staples: $36.99 + tax
Fairy Lights and Greenery: $27.99 + tax
Papasan Chair: $229.99 + tax
Total Shopping Spend: $589.94! (Remember I had a $590 budget! So I went over a bit with tax but hell yeah!)